
Showing posts with label discoairglow. Show all posts
Showing posts with label discoairglow. Show all posts
8.23.2013
Mila Kunis Inspired Metallic Smoky Eye // Wet n Wild Color Icon Comfort Zone Palette
In honor of my new found #newness, I decided to film a Get Ready With Me // Flash Tutorial video of a Mila Kunis inspired metallic smoky eye I wore last night. I've never filmed myself doing my makeup before and I can tell you it was definitely quite the juggling experience. It's funny how even my makeup had become ritualistic.
I decided to step out of my own comfort zone with my new Wet 'n Wild Color Icon Comfort Zone 738 palette that I picked up on Monday night: super spur of the moment purchase but around the $5 mark and the shadows are pretty pigmented for the price. It's an all around winner. The only negative about this palette is that the packaging was so difficult to pry open, I actually thought I was going to break the plastic cover and/or a nail. The shadows stayed on all night and fall out was minimal so I'm fine with the packaging being slightly faulty. What do you expect for five bucks?
8.10.2013
Thrifty
Just a few things I've accumulated from all the obsessive thrifting I've been doing. Let me know in the comments below if you'd like more videos.
6.27.2013


1.20.2013
Happy Belated Birthday to DISCOairglow!

Between the holidays and tax season, I feel like I haven't had the time to do much of anything DISCOairglow, but I realized today that in my neglect I overlooked our one year birthday!
In honor of that, I'd like to say thank you so much to our friends who read the posts and comment. You truly make my day brighter.
Thanks a bunch! Here's to many more.

It's Sunday! Have a mimosa!
10.16.2012
Sneak Peek: Our Wedding Venue

I haven't shared many details about our upcoming nuptials yet, but I'll let you in on the fact that we are having a small (very small) intimate wedding with just our parents, our good friend who is our minister and another good friend who will be taking pictures. Our wedding date is on the 3rd of November of this year. Yes, that is less that a 3 weeks away!!
However, because I have such a HUGE Hispanic family, we are having an equally huge Hispanic sized 2nd wedding and reception on May 23rd of 2013 to allow the peeps on the other side of the equator ( and all over the states) time to get there. Some of you might wonder why we don't just wait until May and just do one wedding, and our answer to that is that we didn't want a big wedding in the first place. We want to experience just celebrating with a very small group of just our parents and not get caught up in the hoopla. The second wedding is more of a party for our families to be able to celebrate with us and just have a great time.
This past weekend we went over to the Sugar Mills Botanical Gardens where we plan on getting married in 3 weeks and I took a few snap shots to give you all a sneak peek. ;)
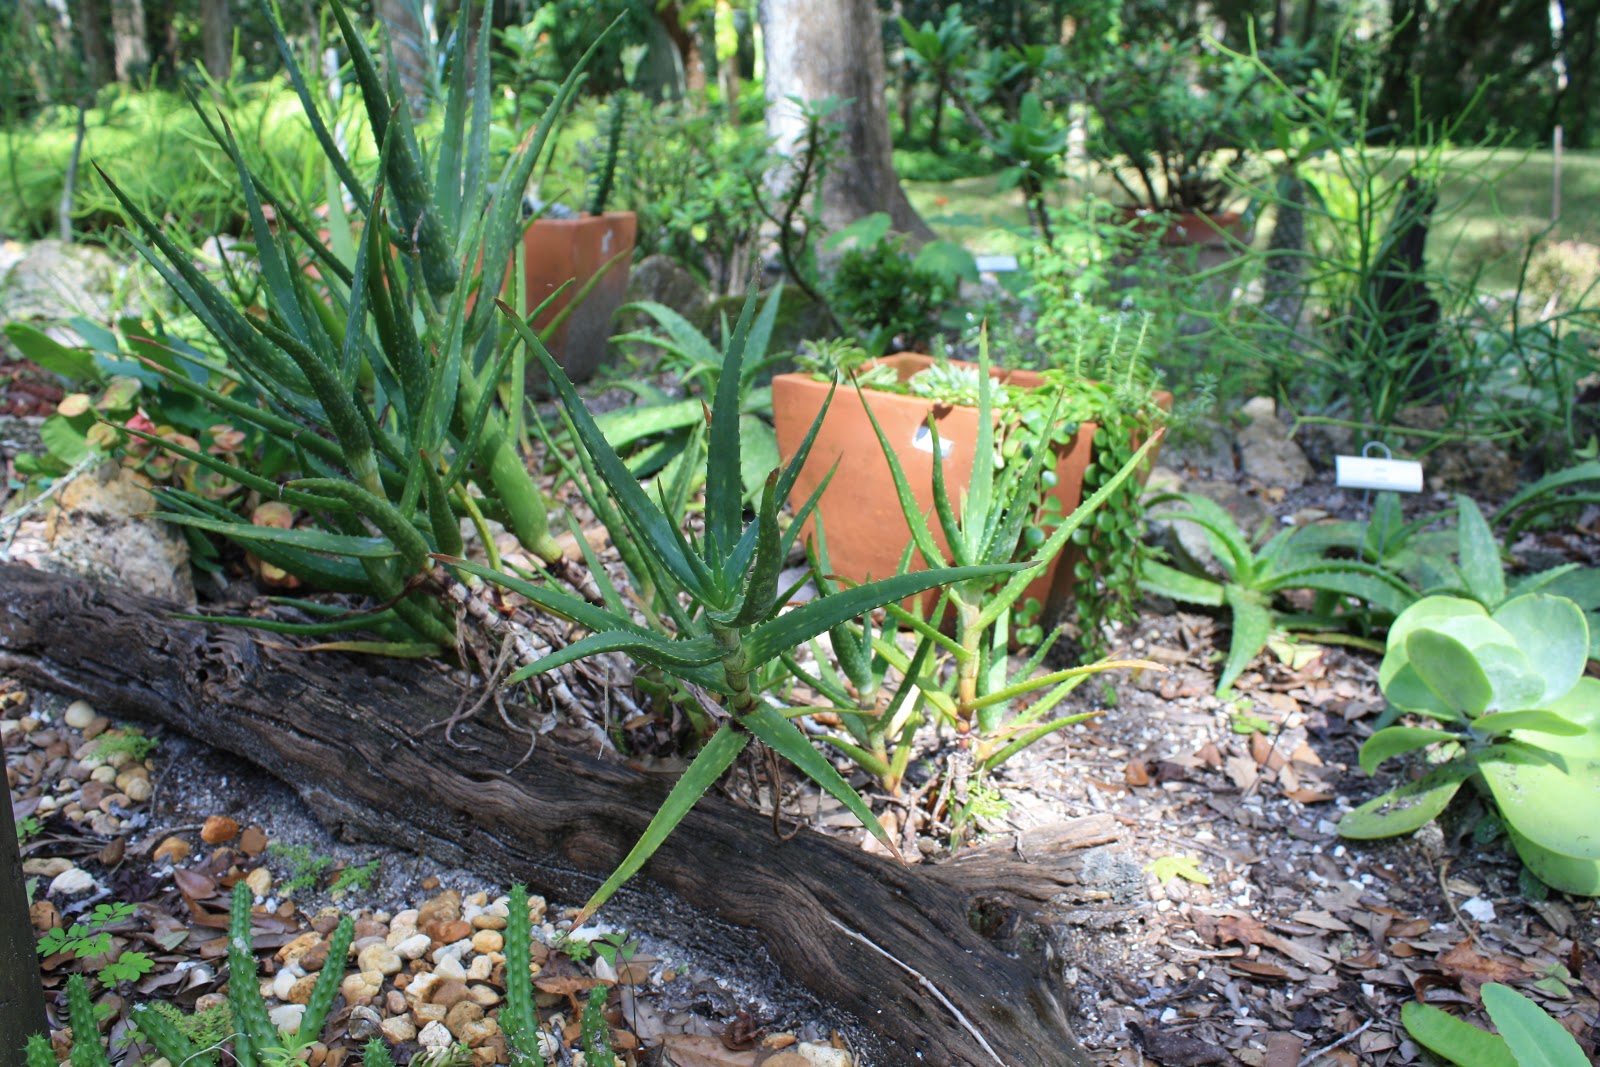


This is where we will exchange our vows. Isn't this Confederate Oak tree beautiful?

.........
The second wedding and reception is going to be in Charlotte, NC at my parents home. It should make for some great memories and fantastic shenanigans. Can't wait to bring you along for that! I plan on sending the Save the Dates out before the 1st wedding so that people are aware that we didn't forget about them and of course, in true DISCOairglow fashion there will be a DIY.
Stay tuned for that this week!
-M
9.06.2012
Wedding Bouquet Inspo

(not me, but I loved the uniqueness of the bouquet!)
8.11.2012
STICKYGRAMS!!

I'm totally obsessed!
Ordered my Stickygrams last week and I'm so excited to put them up on the fridge TODAY!!
AHHHH!!
Best part is they're only $14.99! Completely reasonable and nice addition to your fridge art display. (Or the start of one, if you're like me) I also had a coupon and they have free shipping anyway so they were even cheaper. ahh.. bargains.
The promo code is FRIEND7XH9 if you want to make these babies yours, too! ;)
You're welcome.
Ha.
Update: A friend of a friend asked where I bought these from and I felt like a complete tool 'cause forgot to tell you all where. I got them at Stickygram.com! :)
Hi Cheyenne! Thanks for reading!
Like always, if you have any questions or words of encouragement, leave them in the comments!
They make my day!
7.04.2012
Salute Your Shorts! DIY American Flag Shorts
Happy Fourth of July!

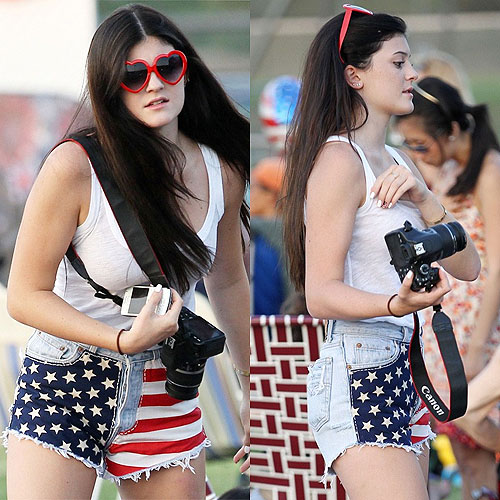

I know it might be a little late for you to make them to wear tonight, but I have a feeling that these shorts aren't just for the 4th of July. The Americana trend is hot right now, and so I decided to jump on the bandwagon make my own DIY flag shorts. ha.
I was inspired by the ones Kylie Jenner is wearing in the picture above, and I believe they are by Runwaydreamz... here's a better picture.


You will need:

1. Shorts: Got mine at Goodwill for dirt cheap. Less than 3 bucks. Can't beat that.
2. Star stickers: Michaels had a sale on stickers right now. random.
3. Fabric paint: also at Michaels, they were a dollar and change each.
4. Scissors
5. Brushes. Hard Bistle and an fine angled brush.
Paper plate to put your paint and a towel for the floor.
Remember that your working with fabric paint and it won't come out of clothes, so wear something you craft/paint in.
Ok. So this is what I did in a nutshell.
1.

Cut your shorts and wash them.
2.

Tape where you don't want the paint to be.
3.

Lay tape for stripes down with 1'' tape on right side (left side when you're wearing them)
4.

Measure and add stars to the left side. (right side when you're wearing them)
5.

Apply blue paint. (I used metallic paints, and it looks awesome)
6.

Take out every other tape strip and add red paint and let it dry to the touch.
7.

Once dry, remove the stars and switch the tape back on the red stripes to paint the white stripes.
With an angled brush I filled in the stars on the blue side.
Let the whole thing dry overnight. Read the instructions on the back of the paint for washing. Mine says 72 hours before I can wash them so that is what I am doing.
In the morning you can remove all the other blue tape and reveal your new shnazzy pair of star spangled shorts!

TA-DAH!
Here is a picture I Instagramed earlier of me wearing them. (find me @DISCOairglow)

Hope you have a great holiday!
Will you be trying out this trend?
Leave me a comment below!
5.25.2012
DIY Snakeskin Tray
Solid Tray Instructions:
1. Wash and dry your fabric then iron it.
2. Mod Podge the side facing out to prevent fraying.
3. After it has dried for an hour, measure and cut your fabric to fit.
4. Make sure you center the pattern how you want it.
5. Apply Mod Podge to both the tray and the fabric and press it down firmly.
6. Smooth out all the air bubbles. Here is where the rewards card it handy.
7. Once the top had dried completely, flip it over and do the same for the back.
8. Cut the corners at an angle.
9. Apply Mod Podge all over the edges and corners to seal everything.
10. Let it dry overnight.
10. Let it dry overnight.
11. Optional: If you feel they tray is too sticky, spray it with clear acrylic spray.

Clear Plate/Tray Instructions:
1. Flip your tray over onto a bowl to keep it from touching the table.
2. Apply Mod Podge to the back of the tray and to the side you want to show through. (This is very important, or you will end up seeing the back of the fabric.)
3. Lay it on the tray and smooth out the air bubbles with your fingers and the rewards card.
4. After it has dried, cut the edges.
5. Finish by applying Mod Podge to the back of the tray for any stray edges and for durability.
6. Optional: Again, you can use clear acrylic spray if your tray is too sticky.

So, lately snakeskin trays have been all over the blogosphere and all in my brain. I am officially obsessed with them and I needed one like, yesterday.
Here are a few pictures to get you in the mood. *Cue Marvin Gaye and scroll slowly*


Sexy right? Oh man.
Unfortunately, when I went on the quest to find one like them, all were out of budget and back ordered to boot. womp womp.
Here are the ones I found:
$87.50 at Multichic.com

This one is by Two's Company and is a set of 3 for $92.99

Totally UH-mazing.
Needless to say the cheapest one I found was this one for $40-$55 at jaysonhomeandgarden.com... and they were out of stock, too. Awesome.

On to plan B. Make one!
I gave myself a budget of $25 and I came in under budget.
Materials:
Mod Podge: $6.49 (had a 40% off coupon): $4.19
Fabric: $10 + $4.90s&h
Tray: Had one, but the clear plate was $3 at Walmart
Foam brushes: $0.50/ pop, Home Depot
Old Rewards Card: Free anywhere.
(I finally got some use out of my Costco card)
Total: $23.09 for 2
The tray I used was originally purchased at Walmart for like $8 or $9, but you can pick one up at a thrift store for much less.
I found a few different fabrics that I liked
This white one from Decorative Fabrics Direct was a close match but was $19.95/ yard, which was on special from $31.45.

This darker one I found on Fabric.com and was $7.98, but was a little too dark for my taste.

... And lastly I found the Goldy Locks of fabrics on eBay from a seller called The Sew Shop for just $10!

What do you think? Would you make your own snakeskin tray?
5.07.2012


Subscribe to:
Posts (Atom)